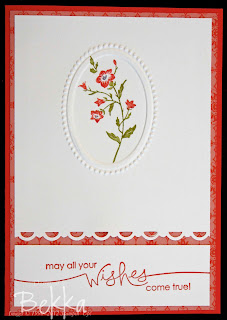
... Without leaving a mark where the edge of the folder was. On Sunday I showed you this card with the image from the Charming Stamp Set an Embossed Oval from the Stampin' Up! Designer Embossing Frames.
It prompted several people to ask how I had embossed the oval in the middle of the card without getting marks from the edge of the embossing folder, so for this week's Find Out About Friday I thought I would share how with you.
The Designer Embossing Frames are approximately half the size of the other Stampin' Up! Embossing Folders which means you have a lot of flexibility over where you can place them on your card. It does however mean that the edges of the embossing folder will be on the surface of your card and in some instances may leave a slight mark.
If the mark is very pronounced you may want to check the 'sandwich' you are using on your Big Shot (or other similar machine). My removing one thin layer from the sandwich you may exclude the problem.
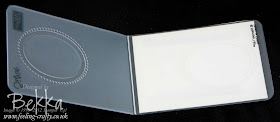
However there may still be small marks, so the following trick will help you remove them all together. As well as your embossing folder you will need a piece of sturdy card, for example the card you find at the back of a pack of Stampin' Up! Designer Series Paper. Cut a piece of this just smaller than the back of your Designer Frames Embossing Folder. Stick this to the back of your folder, on the outside, like this. I used Snail adhesive to stick the card on.
Now when you use your folder make sure you use less in your sandwich than normal - in the case of the Big Shot I use just my multi purpose platform with none of the tabs.
I hope this helps you all use the Stampin' Up! Designer Frames Embossing Folders with ease and without extra marks in the middle of your cards
Happy Stampin'


Thanks Bekka, great top tip!
ReplyDeleteGoing off to try this now: you've answered something that's been a niggle for a while: thank you!
ReplyDelete