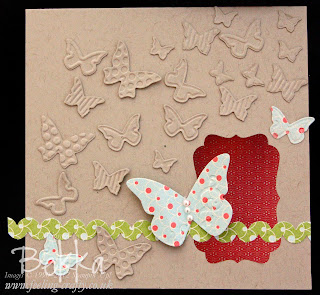
I have had an idea for a card floating round in my head for a while but when I made it, I found I needed something Stampin' Up! dont currently offer in the UK - Ric Rac. Never one to be stopped by a little thing like that I decided to make my own Ric Rac using my Stampin' Up! Scallop Edge Punch.
By the time I had made my first piece of Ric Rac I was actually quite pleased that I was not being limited to a few colours as by making my own I can have any colour, any pattern and any width of Ric Rac I want!
So for this week's Find Out About Friday I thought I would share the card that has been floating round in my head and how to make your own Ric Rac using a Scallop Edge Punch.
First the card.
It just did not look right with a straight piece of patterned paper, or ribbon across the front - it really needed the Ric Rac.
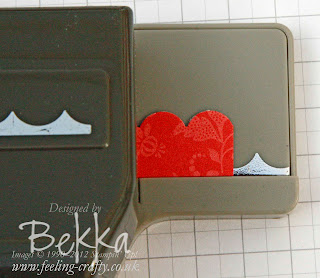
It was really very easy to make - Its probably more complicated to describe than it is to actually do!. Start with a strip of paper or card, mine was half an inch wide and scallop one side. I found it helped if I started my scallops with the end of the strip lined up with the dip between scallops.
Next turn the strip around and put the flat side into the punch. Carefully line the strip up so that the end of one complete scallop is in the middle of the bump of the next scallop, so that you are punching half a scallop along. Its probably easier to show you in this picture.
Once you have punched along your strip it should look like this
and be ready to use - like this!
There is a growing trend for Ric Rac and I am glad that with my Scallop Edge Punch I can now add my customised Ric Rac to any project I like!
If you enjoyed today's tip for getting more from your punches make sure you are signed up for my newsletter - I have an Easter Project which makes use of punches exclusively for subscribers. To subscribe just pop your email address in the box at the top right hand side of this blog - its totally free and you will get two email newsletters a month with tips, tricks, special offers and exclusive subscriber projects.
Happy Stampin'


No comments:
Post a Comment